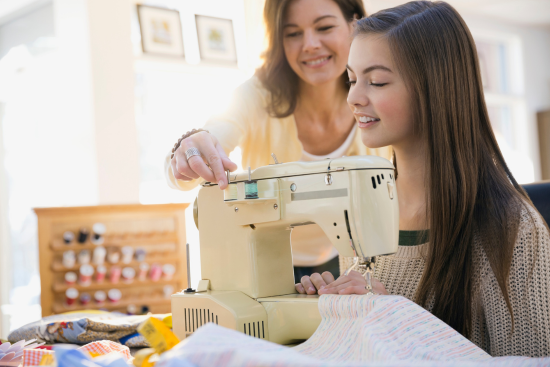
There’s a particular kind of panic that hits the first time you sit down in front of a sewing machine you’ve just taken out of the box. All those levers, dials, and a needle that looks a lot sharper than you remembered from home ec class. I still remember borrowing my grandmother’s old Singer for a Halloween costume in college and spending forty-five minutes just trying to get the thread through the needle. It turns out that learning how to use a sewing machine isn’t actually complicated once someone walks you through it in the right order — the problem is that most manuals explain the parts before they explain the logic, and that’s backwards.
This guide does it the other way around. We’ll cover what each part of the machine actually does, how the process fits together, how different machine types change the experience, and — step by step — how to use a sewing machine from the moment you plug it in to the moment you snip your first finished seam. Along the way we’ll look at where sewing machines even came from, which models are worth buying if you’re starting from zero, and the small mistakes that trip up almost every beginner.
A Quick History: When Was the Sewing Machine Invented
Before getting into the mechanics, it helps to know where this device came from, because the basic idea hasn’t actually changed all that much in nearly 200 years.
The question “when was the sewing machine invented” doesn’t have one tidy answer, because several inventors were racing toward the same idea at roughly the same time. The first workable lockstitch sewing machine is generally credited to Barthélemy Thimonnier, a French tailor who patented a chain-stitch machine in 1830 — and promptly had his factory burned down by furious tailors who feared it would destroy their livelihoods. A decade later, in the United States, Elias Howe patented a machine using a lockstitch design with an eye-pointed needle in 1846, which is closer to how modern machines actually work.
The name most people associate with sewing machines, though, is Isaac Singer. Singer didn’t invent the sewing machine from scratch, but in 1851 he patented improvements — an up-and-down needle motion powered by a foot treadle instead of a hand crank — that made the machine practical for everyday home use. Singer also pioneered installment payment plans for household goods, which is a big part of why his company, rather than Howe’s, became a household name. By the 1860s, sewing machines had gone from a novelty to a fixture in middle-class homes across Europe and North America, cutting the time it took to make a shirt from over 14 hours by hand to about an hour by machine.
That history matters for a practical reason: the core mechanism you’ll be using today — a needle carrying thread down through fabric to meet a second thread coming up from a bobbin, locking the two together — is essentially the same system Howe and Singer refined in the 1840s and 50s. Learning how to use a sewing machine today means learning a 170-year-old idea, just with better electronics wrapped around it.
Understanding the Machine: Parts and What They Do
Every home sewing machine, whether it cost $80 or $800, shares the same core parts. Once you can name them, the instructions in any manual — including this one — start making a lot more sense.
| Part | What it does | Why it matters |
|---|---|---|
| Spool pin | Holds the thread spool in place | Starting point for threading the top thread |
| Tension dial | Controls how tightly the top thread is pulled | Wrong tension causes loose loops or puckered fabric |
| Take-up lever | Lifts and releases thread with each stitch | Must be threaded correctly or stitches will skip |
| Needle clamp | Holds the needle in place | Needle size/type must match fabric weight |
| Presser foot | Holds fabric flat against the feed dogs | Lifting it releases tension so you can reposition fabric |
| Feed dogs | Small teeth under the needle plate that move fabric | Control stitch length and even fabric feeding |
| Bobbin | Small spool holding the bottom thread | Works with the top thread to lock each stitch |
| Bobbin case | Housing that holds the bobbin under the needle plate | Tension here must match the top thread tension |
| Stitch selector | Dial or screen to choose stitch type | Different fabrics and seams need different stitches |
| Handwheel | Manually raises/lowers the needle | Useful for precise starts, stops, and troubleshooting |
| Foot pedal | Controls the machine’s speed | Pressure-sensitive on most machines — light pressure, slow stitching |
If you only remember two things from that table, make them these: the top thread and the bobbin thread have to work together, and tension is the setting most beginners fight with. Almost every “my stitches look wrong” problem traces back to one of those two things.
Does It Matter Which Type of Sewing Machine You Have?
Yes — and this is a detail a lot of beginner guides skip. How to use a sewing machine changes somewhat depending on which category yours falls into, so it’s worth knowing which one is in front of you.
Mechanical machines are controlled by dials and use physical cams to create stitch patterns. They’re the most beginner-friendly because every setting is visible and tactile — you turn a dial, you see it move, you understand what happened. Threading and bobbin-winding work exactly as described in this guide.
Computerized (electronic) machines replace some dials with buttons or a small screen, and often include automatic tension adjustment and dozens of built-in stitches. The core process of threading, winding a bobbin, and sewing a seam is nearly identical — the machine just automates a few of the decisions. Where they differ is in setup menus, which vary by brand, so you’ll need to check the manual for machine-specific steps like automatic needle threading or stitch-width buttons.
Sergers (overlockers) are a different animal entirely. They use 3–5 threads instead of 2, trim fabric edges as they sew, and are built for finishing seams rather than construction. If you’re a total beginner, don’t start here — learn on a standard machine first.
Heavy-duty and industrial machines (used for denim, canvas, upholstery) have stronger motors and different tension requirements but follow the same threading logic as a home mechanical machine, just with heavier thread and larger needles.
For the rest of this guide, we’re focused on standard mechanical and computerized home machines, since that’s what the overwhelming majority of beginners are using.
How to Use a Sewing Machine: Step-by-Step for Beginners
This is the part most people are here for, so let’s go through it properly, in the order that actually makes sense the first time you sit down.
Step 1: Set Up Your Machine and Workspace
Place the machine on a flat, stable surface with enough room on the left side for fabric to move freely as you sew. Plug it in, and if it has a knee lever or foot pedal, position that comfortably under the table. Good lighting matters more than people expect — a small desk lamp aimed at the needle area will save you from squinting at thread later.
Step 2: Wind the Bobbin
Before you can sew a single stitch, the bobbin needs thread on it. Place an empty bobbin on the bobbin-winding spindle (usually on the top of the machine), guide the thread from the main spool through the bobbin-winding tension disc, and wrap it a few times around the bobbin by hand. Push the bobbin winder into its “engaged” position, and either press the foot pedal gently or use a dedicated bobbin-wind button. The bobbin will fill evenly if the thread is guided correctly — if it winds lopsided, stop and rethread it through the tension disc.
Step 3: Insert the Bobbin
Open the bobbin case, usually located under a small door or removable plate below the needle. Drop the bobbin in so the thread unwinds in the correct direction (there’s typically a small diagram etched into the machine near this spot), and pull the thread through the tension spring slot until you feel light resistance. Leave a few inches of thread trailing out.
Step 4: Thread the Top of the Machine
This is the step that trips up the most beginners, so go slowly the first few times. Raise the presser foot — this releases the tension discs so thread can seat properly, which is a detail almost everyone forgets and then wonders why their stitches are a mess. Place your spool on the spool pin, and follow the threading path (usually marked with numbers or arrows on the machine body): through the first thread guide, down and around the tension discs, up and through the take-up lever, down through one or two more guides, and finally through the eye of the needle, generally front to back.
Step 5: Bring the Bobbin Thread Up
Hold the top thread loosely and turn the handwheel toward you one full rotation. This drops the needle down and back up, catching the bobbin thread and pulling a loop of it up through the needle plate. Gently pull that loop until you have both thread tails free, and move them under the presser foot toward the back of the machine.
Step 6: Choose Your Stitch and Settings
For your very first practice seam, use a straight stitch at a medium length (around 2.5mm). Set the tension to the machine’s default — usually marked around “4” on a dial from 0–9 — and don’t touch it again until you’ve actually sewn a few lines and can see whether it needs adjusting.
Step 7: Sew a Test Line
Take a scrap of plain cotton fabric, not the project you actually care about. Place it under the presser foot, lower the foot, and gently press the foot pedal. Let the machine set the pace at first rather than pushing or pulling the fabric — your job is mainly to guide it straight, not drag it through. Sew a straight line, then stop, raise the needle with the handwheel, lift the presser foot, and pull the fabric free (never yank fabric out while the needle is still down — it can bend or snap).
Step 8: Check and Adjust Tension
Look closely at your test line. If it looks like a straight, even row of stitches on both the top and bottom of the fabric, your tension is fine. If you see loops on the underside, the top tension is too loose (turn the dial up slightly). If the fabric is puckering or the bobbin thread is visible on top, the top tension is too tight (turn the dial down slightly). This small bit of troubleshooting is genuinely the most important skill in learning how to use a sewing machine well — everything else is repetition.
Step 9: Backstitch to Secure Your Seam
At the start and end of any seam, sew a few stitches forward, then use the reverse lever or button to sew backward over them, then forward again. This locks the stitches so they don’t unravel — skipping it is one of the most common beginner mistakes, and it’s the reason a seam that looked fine can fall apart the first time it’s worn or washed.
Step 10: Practice Curves and Corners
Once straight lines feel comfortable, practice pivoting: stop with the needle down (this is critical — it acts as a pin holding your place), lift the presser foot, turn the fabric, lower the foot, and continue. This single technique is how every corner, curve, and complex seam gets sewn.
Repeat these steps on scrap fabric for at least half an hour before starting a real project. Muscle memory does more here than reading ever will.
Matching Needle, Thread, and Stitch to Your Fabric
One thing that rarely gets explained clearly is that how to use a sewing machine well isn’t just about technique — it’s also about matching your supplies to your material. Using the wrong needle or thread is one of the fastest ways to end up with skipped stitches, puckered seams, or a snapped needle, even if your threading and tension are perfect.
| Fabric type | Needle | Thread | Stitch |
|---|---|---|---|
| Quilting cotton, muslin | Universal 80/12 | All-purpose polyester | Straight stitch, 2.5mm |
| Denim, canvas | Denim/jeans 90/14–100/16 | Heavy-duty or upholstery thread | Straight stitch, 3.0mm |
| Jersey, knits | Ballpoint or stretch 75/11 | All-purpose polyester | Narrow zigzag or stretch stitch |
| Silk, chiffon | Sharp/microtex 60/8–70/10 | Fine polyester or silk thread | Straight stitch, 1.5–2.0mm |
| Fleece, minky | Ballpoint 90/14 | All-purpose polyester | Wide zigzag or stretch stitch |
| Leather, vinyl | Leather needle 90/14–100/16 | Heavy-duty thread | Straight stitch, long length |
A rough rule that experienced sewers rely on: heavier, tightly woven fabrics need a bigger needle number and a slightly longer stitch, while lightweight or stretchy fabrics need a finer needle and a shorter, more flexible stitch. Getting this pairing right solves a surprising number of problems that people mistakenly blame on the machine itself.
Sewing Machine Accessories Worth Having
Most machines come with a basic accessory kit, but a few extras make the learning process noticeably smoother. A seam ripper is non-negotiable — every beginner uses one constantly, and that’s completely normal, not a sign you’re doing something wrong. A walking foot helps feed multiple layers or slippery fabric evenly, which is especially useful once you move past scrap-fabric practice into real projects like quilts or jackets. Fabric clips or pins hold layers in place before sewing, and a seam gauge (a small ruler with a sliding marker) makes it much easier to keep seam allowances consistent, which is one of the quiet skills that separates tidy homemade garments from lopsided ones. Finally, a spare set of bobbins in the style your specific machine uses saves a lot of mid-project frustration, since bobbins are not universally interchangeable between brands.
Common Beginner Mistakes (and How to Fix Them)
- Thread bunching underneath (“bird’s nesting”): Almost always caused by not raising the presser foot before threading the top of the machine, so tension discs never engaged.
- Skipped stitches: Usually a dull, bent, or wrong-size needle. Needles are cheap — replace them roughly every 8–10 hours of sewing, or immediately after sewing something heavy like denim.
- Fabric not feeding: Check that the feed dogs are raised (some machines have a drop-feed switch for free-motion work) and that the presser foot pressure is set correctly for your fabric weight.
- Needle breaking: Almost always from pulling fabric instead of letting the feed dogs do the work, or using too fine a needle on a heavy fabric.
- Uneven stitch length: Often a sign the fabric is being pulled rather than guided — let the machine set the pace.
What Sewing Machine Is Best for Beginners
This is one of the most common questions people ask before they’ve even touched a machine, and it’s worth answering honestly: the “best” beginner machine isn’t the cheapest or the most feature-packed — it’s the one with a simple, mechanical interface and a reliable straight and zigzag stitch. Based on durability, ease of threading, and how forgiving they are of beginner mistakes, here’s a practical ranking of the machine types and models most commonly recommended by sewing instructors and long-time hobbyists.
- Brother CS7000X (or similar Brother computerized beginner models) — Genuinely one of the most recommended starter machines because of its automatic needle threader, clear stitch-width display, and huge amount of online tutorial support (it’s popular enough that almost any question has already been answered by someone else online).
- Singer Heavy Duty 4423 — A mechanical machine with a strong metal frame, higher sewing speed, and enough power to handle denim and canvas without complaint. A great pick if you want simplicity and durability over bells and whistles.
- Janome HD3000 — Known for being nearly indestructible, with a metal interior frame and straightforward dial controls. Popular with quilters and beginners who plan to sew often rather than occasionally.
- Brother XM2701 — A genuinely budget-friendly option that still includes 27 built-in stitches and an automatic threader; a sensible choice if you’re not sure sewing will stick as a hobby yet.
- Singer Simple 3232 — Very few settings to get wrong, which makes it a good “training wheels” machine, though it has less power for heavier fabrics than the models above.
A few practical buying notes: avoid ultra-cheap plastic machines under roughly $60, since their tension mechanisms are often inconsistent and will make learning harder rather than easier. An all-metal internal frame (even in an otherwise plastic-bodied machine) tends to predict a longer lifespan. And if possible, buy from a shop or brand with accessible customer support or local repair technicians — sewing machines are mechanical devices, and even good ones eventually need a tune-up.
Interesting Facts About Sewing Machines
- The word “sewing machine” almost didn’t apply to Thimonnier’s 1830 invention at all — angry tailors destroyed his factory because they feared unemployment, and he died in poverty despite being the first to patent a working design.
- Isaac Singer’s company survived not because his machine was dramatically better engineered than competitors’, but largely because of aggressive marketing and the installment payment plan, which let working-class families buy machines they couldn’t afford outright.
- Modern industrial sewing machines can sew well over 5,000 stitches per minute — roughly 80 stitches every second.
- The zigzag stitch, now standard on almost every home machine, wasn’t widely available to home sewers until the 1950s.
- NASA’s spacesuits are partly hand- and machine-sewn, with seamstresses at companies like ILC Dover using heavy-duty machines similar in principle to home ones, just built for far tougher materials.
Basic Maintenance to Keep Your Machine Running Well
A sewing machine that’s cleaned and oiled properly can genuinely last decades — plenty of people still use machines their grandmothers owned. After every few projects, brush out lint from around the bobbin case and feed dogs (a small brush usually comes with the machine). Change the needle regularly, since a dull needle is the single most common cause of stitch problems. If your manual calls for it, add a drop of sewing machine oil to the moving metal parts every so often — but check first, since some newer computerized machines are sealed and don’t need manual oiling. And when you’re done sewing for the day, cover the machine to keep dust out; dust in the tension mechanism is a slow but steady cause of problems down the line.
Putting It Into Practice: Your First Real Projects
Once you’ve spent time on scrap fabric and feel confident with straight lines, corners, and tension adjustments, it’s worth moving to a few forgiving real-world projects before tackling anything ambitious. A simple tote bag is a good first choice — it’s mostly straight seams, uses sturdy cotton or canvas that’s easy to control, and any small imperfections don’t affect wearability the way they would on clothing. A pillowcase is another classic beginner project for the same reason: straight seams, forgiving fabric, and a genuinely useful result at the end.
From there, drawstring bags, simple A-line skirts with elastic waistbands, and cloth napkins are all good next steps, since they introduce hemming and slightly more precise seam allowances without requiring pattern-matching or set-in sleeves. Save fitted garments, zippers, and buttonholes for once you’re comfortable — not because they’re impossible early on, but because troubleshooting two new skills at once (say, buttonholes and set-in sleeves) tends to be more frustrating than tackling them one at a time.
It’s also worth mentioning that hemming is one of the most immediately useful skills you can build on top of basic straight stitching. Fold the fabric edge under twice (usually about 1cm, then again to hide the raw edge), press it flat with an iron, pin it in place, and sew close to the inner folded edge using the same straight-stitch technique you’ve already practiced. This single skill — hemming trousers, curtains, or sleeves — is often the first practical, money-saving reason people learn how to use a sewing machine in the first place.
Troubleshooting Chart
| Problem | Likely cause | Fix |
|---|---|---|
| Loops on fabric underside | Top tension too loose, or top thread not seated in tension discs | Raise presser foot, rethread top completely, check tension dial |
| Bobbin thread visible on top | Top tension too tight | Lower tension dial slightly, test on scrap fabric |
| Machine jams immediately | Bobbin threaded backward, or thread tangled underneath | Remove bobbin, rewind and reinsert correctly |
| Needle keeps breaking | Needle bent, wrong size for fabric, or fabric being pulled | Replace needle, match needle size to fabric, guide rather than pull |
| Fabric bunches at the start of a seam | Thread tails not held or pulled to the back before starting | Hold thread tails gently for the first few stitches |
| Uneven stitches | Feed dogs dirty or lowered, or inconsistent pedal pressure | Clean feed dogs, check drop-feed switch, apply steady pedal pressure |
Frequently Asked Questions
How do I know if my sewing machine is threaded correctly?
Sew a short test line on scrap fabric. If the stitches look identical and even on both the top and bottom of the fabric, it’s threaded correctly. If you see loops, loose threads, or the machine jams immediately, rethread from the very beginning, making sure the presser foot is raised while you do it.
What’s the easiest stitch to start with?
The straight stitch, at a medium length around 2.0–2.5mm. It’s the foundation of almost every seam, and mastering it — including keeping an even seam allowance — is what makes every other stitch easier to learn afterward.
Why does my thread keep breaking?
This usually comes down to one of three things: tension set too tight, a damaged or improperly threaded needle, or old, brittle thread. Try a fresh needle and a new spool of good-quality thread before assuming the machine itself is faulty.
Can I sew stretchy fabrics like knits on a regular sewing machine?
Yes, with adjustments. Use a ballpoint or stretch needle instead of a standard sharp one, select a narrow zigzag or a dedicated stretch stitch if your machine has one, and avoid pulling the fabric as it feeds, since stretch fabric distorts easily under tension.
How often should I change my sewing machine needle?
As a general rule, every 8–10 hours of active sewing, or immediately if you hear a popping or thudding sound while sewing, notice skipped stitches, or have just finished a heavy fabric like denim or canvas.
Do I need different machines for different fabrics?
Not usually. A single well-maintained home machine can handle most cotton, linen, and blended fabrics, and with the right needle and tension adjustments, it can manage denim, fleece, and light knits too. Only very heavy materials like upholstery leather or multiple layers of canvas typically require a specialized heavy-duty or industrial machine.
Is it hard to learn how to use a sewing machine as a complete beginner?
Not particularly, though it does take patience for the first few sessions. Most of the learning curve is really about understanding tension and getting comfortable guiding fabric at a steady pace — both of which come from practice on scrap fabric rather than reading alone.
Final Thoughts
Learning how to use a sewing machine really comes down to a handful of repeatable steps: wind and insert the bobbin correctly, thread the top with the presser foot raised, get your tension balanced through a bit of trial and error, and practice guiding fabric rather than forcing it. Once those fundamentals click — usually after a few sessions on scrap fabric — everything else, from hemming trousers to sewing your first garment, is really just a variation on the same core process refined over the last 170-odd years since Howe and Singer’s early machines first made it practical for home use. Pick a machine that matches your patience level and budget, keep a spare pack of needles on hand, and give yourself permission to rip out a few seams while you get comfortable. That’s genuinely how everyone, including the people who now teach it, actually learned.