

The modern world is, quite literally, a pain in the back. With a global shift toward sedentary lifestyles—characterized by long hours hunched over keyboards, repetitive scrolling on smartphones, and lengthy commutes—lower back pain has become a near-universal human experience. Statistics suggest that nearly 80% of adults will experience significant lower back pain at some point in their lives.
While medical interventions are sometimes necessary, many find lasting relief through the ancient practice of yoga. Yoga isn’t just about flexibility; it is a holistic system that combines physical postures (asanas), breathwork (pranayama), and mindfulness to address the muscular imbalances and mental stress that often exacerbate spinal issues.
In this comprehensive guide, we will explore ten essential yoga poses specifically designed to decompress the spine, strengthen the core, and release the tight hip flexors that pull the lower back out of alignment.
Understanding the Anatomy of Lower Back Pain
Before diving into the poses, it is crucial to understand why your back hurts. Lower back pain (LBP) often stems from a few primary culprits:
-
Tight Hamstrings and Hip Flexors: When these muscles are short and tight, they pull on the pelvis, tilting it forward or backward and putting immense strain on the lumbar vertebrae.
-
Weak Core Muscles: Your abdominal and back muscles act as a natural “corset.” If they are weak, the spine lacks the support it needs to stay upright without strain.
-
Spinal Compression: Gravity and poor posture compress the intervertebral discs over time.
-
Stress: Mental tension often manifests physically in the lower back and shoulders.
Yoga addresses all four of these areas simultaneously. By lengthening the tight tissues and strengthening the stabilizing muscles, you create a “space” in the spine that allows for healing.
1. Cat-Cow Pose (Marjaryasana-Bitilasana)
If you only have two minutes to spare, make it Cat-Cow. This is the gold standard for spinal mobility. It serves as a gentle “internal massage” for the spine and the abdominal organs.
How to do it:
-
Start on your hands and knees in a tabletop position. Ensure your wrists are directly under your shoulders and knees under your hips.
-
Inhale (Cow Pose): Drop your belly toward the mat, lift your chin and chest, and gaze up toward the ceiling. Broaden your collarbones.
-
Exhale (Cat Pose): Draw your belly button toward your spine and round your back toward the ceiling. Tuck your chin to your chest, mimicking a stretching cat.
Why it works:
Cat-Cow moves the spine from flexion to extension. This movement helps circulate spinal fluid and warms up the muscles surrounding the lumbar region, preparing them for deeper stretches.
2. Child’s Pose (Balasana)
Child’s Pose is the ultimate restorative posture. It is a resting position that provides a gentle stretch for the lower back and hips while calming the nervous system.
How to do it:
-
Kneel on the floor, touch your big toes together, and sit on your heels.
-
Separate your knees about hip-width apart (or wider for more comfort).
-
Exhale and lay your torso down between your thighs.
-
Reach your arms forward with palms down, or rest them alongside your thighs with palms up.
-
Rest your forehead on the mat and breathe deeply into your back ribs.
Why it works:
It creates length in the spine by gently pulling the tailbone away from the crown of the head. It is particularly effective for relieving pain caused by spinal compression or general fatigue.
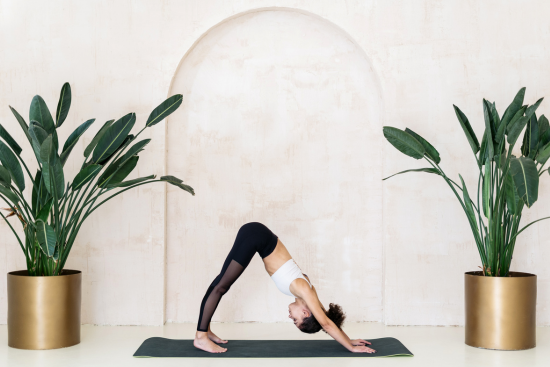
3. Downward-Facing Dog (Adho Mukha Svanasana)
Though often viewed as an arm or shoulder strengthener, Downward-Facing Dog is one of the best ways to traction the spine and stretch the hamstrings.
How to do it:
-
From tabletop, walk your hands slightly ahead of your shoulders.
-
Tuck your toes and lift your knees off the floor, reaching your sit bones toward the ceiling.
-
Keep a slight bend in your knees if your hamstrings are tight. This is crucial—forcing straight legs often rounds the lower back, which we want to avoid.
-
Press firmly through your palms and rotate your inner elbows toward each other.
Why it works:
By elongating the hamstrings and calves, you reduce the “tug-of-war” on your pelvis. The inverted nature of the pose allows gravity to assist in decompressing the vertebrae.
4. Sphinx Pose (Salamba Bhujangasana)
For those with a herniated disc or general “slumped” posture, Sphinx Pose is a gentle way to reintroduce a healthy curve into the lower back.
How to do it:
-
Lie on your stomach with your legs extended behind you.
-
Place your elbows under your shoulders and your forearms on the floor, parallel to each other.
-
Gently press your pubic bone into the mat and lift your chest.
-
Keep your gaze forward and your shoulders relaxed away from your ears.
Why it works:
Unlike deeper backbends like Cobra, Sphinx is accessible and low-impact. It strengthens the erector spinae muscles and helps restore the natural lumbar curve (lordosis) that we lose while sitting in chairs.
5. Pigeon Pose (Eka Pada Rajakapotasana)
Tight hips are a leading cause of lower back pain. When the piriformis and glutes are tight, they can irritate the sciatic nerve and pull on the base of the spine.
How to do it:
-
From Downward Dog, bring your right knee forward toward your right wrist.
-
Place your right ankle somewhere behind your left wrist. (Your shin doesn’t have to be parallel to the front of the mat).
-
Slide your left leg back, ensuring your hips are square to the floor.
-
If comfortable, fold forward over your front leg.
Why it works:
Pigeon Pose is a deep hip opener. By releasing the external rotators of the hip, you alleviate the tension that often travels upward into the lumbar region.
6. Thread the Needle (Sucirandhrasana)
Also known as “Eye of the Needle,” this is a safer, supine version of the hip opener for those who find Pigeon Pose too intense for their knees.
How to do it:
-
Lie on your back with your knees bent and feet flat on the floor.
-
Cross your right ankle over your left thigh, just above the knee.
-
Reach your right arm through the “hole” you’ve created and grab the back of your left thigh with both hands.
-
Gently pull your left knee toward your chest.
Why it works:
This pose provides a controlled stretch for the gluteus maximus and piriformis. Because your back is flat on the floor, your spine remains in a neutral, supported position throughout the stretch.
7. Triangle Pose (Trikonasana)
Lower back pain isn’t just about the back and front; it’s about the sides too. The Quadratus Lumborum (QL) is a deep abdominal muscle that often gets tight and painful.
How to do it:
-
Stand with your feet wide apart. Turn your right foot out 90 degrees and your left foot in slightly.
-
Extend your arms out to the sides, parallel to the floor.
-
Reach your right hand forward over your right leg, then hinge at the hip to bring your hand down to your shin, a block, or the floor.
-
Reach your left arm toward the sky.
Why it works:
Triangle Pose stretches the sides of the torso and the hamstrings. By lengthening the QL and the oblique muscles, you create more lateral stability for the spine.
8. Two-Knee Spinal Twist (Supta Matsyendrasana)
Twisting is excellent for “wringing out” tension, but it must be done carefully to avoid shearing the discs.
How to do it:
-
Lie on your back and bring your knees into your chest.
-
Extend your arms out to the sides like a ‘T’.
-
As you exhale, slowly lower both knees to the right side of your body.
-
Keep both shoulders pressed firmly into the mat. Look toward your left hand.
Why it works:
This gentle twist hydrates the spinal discs and relaxes the muscles of the lower back. It is a fantastic “finishing” pose to neutralize the spine after a series of stretches.
9. Extended Puppy Pose (Uttana Shishosana)
Think of this as a cross between Downward Dog and Child’s Pose. It is arguably the best pose for spinal traction.
How to do it:
-
Start on all fours (tabletop).
-
Walk your hands forward as far as possible while keeping your hips stacked directly over your knees.
-
Lower your forehead or chin to the mat.
-
Keep your arms active and your elbows lifted off the floor.
Why it works:
It provides a deep stretch for the upper and middle back while allowing the lower back to lengthen without the weight-bearing stress found in standing poses.
10. Legs-Up-The-Wall (Viparita Karani)
Healing often requires stillness. This restorative pose is a favorite among physical therapists and yogis alike for LBP relief.
How to do it:
-
Sit sideways as close to a wall as possible.
-
Swing your legs up onto the wall as you lie back on the floor.
-
Your body should form an ‘L’ shape. If your hamstrings are tight, scoot your hips a few inches away from the wall.
-
Close your eyes and stay here for 5–10 minutes.
Why it works:
This pose takes all the pressure off the lower back. It allows the muscles to completely disengage, promotes venous return (blood flow), and calms the sympathetic nervous system, reducing the perception of pain.
Essential Safety Tips for Back Pain
When practicing yoga for back pain, the “no pain, no gain” mentality is your worst enemy. Follow these guidelines to ensure your practice is healing, not harmful:
-
Avoid Rounding: In forward folds, always hinge from your hips and keep your spine long. If you round your lower back, you increase the pressure on your discs.
-
Bend Your Knees: There is no trophy for touching your toes with straight legs. Bending your knees protects your lower back.
-
Use Props: Blocks, straps, and bolsters are not “cheating.” They bring the floor to you, allowing you to maintain proper alignment.
-
Breathe: If you are holding your breath, your muscles will tense up. Deep, diaphragmatic breathing signals to your brain that it is safe to let the muscles relax.
-
Consult a Professional: If you have a diagnosed condition like spondylolisthesis or a severe herniation, consult your doctor or a physical therapist before beginning a yoga regimen.
Conclusion: Consistency is Key
Yoga is not a “one-and-done” pill. The structural issues that cause lower back pain often take years to develop, and they won’t disappear after a single session. However, by incorporating these ten poses into a daily or bi-weekly routine, you can fundamentally change the relationship between your muscles and your spine.
Beyond the physical benefits, yoga teaches proprioception—the awareness of where your body is in space. As you become more mindful of how you sit, stand, and move throughout the day, you will naturally begin to avoid the habits that lead to pain. Roll out your mat, breathe into the tight spots, and give your back the support it deserves.