

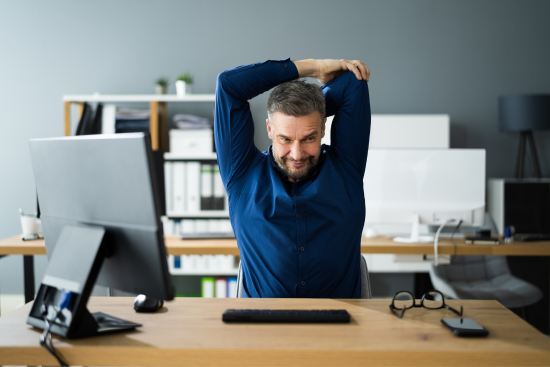
The modern workforce has transitioned from the fields and factories to the digital glow of the office desk. While this shift has revolutionized productivity, it has birthed a silent epidemic: Postural Distortion Patterns. Often referred to as “Computer Neck” or “Office Slump,” poor posture is more than just an aesthetic concern. It is a physiological stressor that impacts breathing, circulation, and musculoskeletal health.
In this comprehensive guide, we will explore the biomechanics of desk-bound posture and provide a detailed roadmap of exercises you can perform without ever leaving your workstation.
The Biomechanics of the “Desk Slump”
To fix a problem, we must first understand it. When you sit for prolonged periods, your body undergoes a series of predictable adaptations known as Upper Crossed Syndrome and Lower Crossed Syndrome.
In the upper body, the pectorals (chest muscles) and the upper trapezius/levator scapulae (neck muscles) become hyperactive and tight. Conversely, the deep neck flexors and the lower stabilizers of the shoulder blades (rhomboids and serratus anterior) become weak and inhibited. This creates a rounded-shoulder, forward-head appearance.
In the lower body, sitting causes the hip flexors to remain in a shortened state, leading to tightness. This often pulls the pelvis into an anterior tilt, weakening the glutes and abdominal wall, which results in chronic lower back pain.
The Foundation: Setting Up Your Ergonomic Command Center
Before jumping into exercises, your environment must support your efforts. No amount of stretching can overcome eight hours of a poorly configured desk.
-
The 90-90-90 Rule: Your elbows, hips, and knees should all be bent at approximately a 90-degree angle.
-
Eye Level: The top third of your monitor should be at eye level to prevent “Text Neck.”
-
Feet Flat: Use a footrest if your feet don’t reach the floor. Dangling legs put unnecessary pressure on the underside of your thighs and pull on the lower back.
Phase 1: Cervical Spine and Neck Realignment
The average human head weighs between 10 and 12 pounds. However, for every inch your head tilts forward, the effective weight on your cervical spine increases by 10 pounds. If you are leaning forward by three inches, your neck is supporting a 40-pound load.
1. The Chin Tuck (The King of Neck Exercises)
This is the most effective movement for reversing forward head posture.
-
How to do it: Sit tall and look straight ahead. Without tilting your head down, pull your chin straight back, as if you are making a “double chin.”
-
The Feeling: You should feel a stretch at the base of your skull and the front of your neck working.
-
Repetitions: Hold for 3 seconds, repeat 10 times every hour.
2. The Levator Scapulae Stretch
The levator scapulae is the muscle that connects your neck to your shoulder blade; it is often the site of “tension knots.”
-
How to do it: Sit on your right hand to keep the shoulder down. Turn your head 45 degrees to the left and look down toward your armpit. Use your left hand to gently pull your head closer to your chest.
-
Duration: Hold for 30 seconds per side.
Phase 2: Opening the Thoracic Cage and Shoulders
Rounded shoulders are caused by tight chest muscles pulling the humerus (upper arm bone) forward and inward. We need to inhibit the chest and activate the back.
1. Desk Chest Opener
-
How to do it: Stand up or sit at the edge of your chair. Interlace your fingers behind your back. Straighten your arms and lift your hands away from your body while squeezing your shoulder blades together.
-
Benefit: This counters the internal rotation of the shoulders caused by typing.
2. The “W” Stretch
-
How to do it: Hold your arms up with elbows bent, forming the letter “W” with your head and torso. Pull your elbows back and down, imagining you are trying to put your elbows into your back pockets.
-
Focus: Squeeze the muscles between your shoulder blades (the rhomboids).
Phase 3: Thoracic Spine Mobility
A stiff mid-back (thoracic spine) forces the lower back and neck to overcompensate, leading to injury.
1. Seated Spinal Rotation
-
How to do it: Sit tall with feet flat. Cross your right leg over your left. Place your left hand on your right knee and your right hand on the back of your chair. Gently twist your torso to the right.
-
Tip: Exhale as you rotate to deepen the stretch.
2. Seated Cat-Cow
Borrowed from yoga, this can be adapted for a chair.
-
How to do it: Place your hands on your knees. Inhale, arch your back, and look toward the ceiling (Cow). Exhale, round your spine, and tuck your chin to your chest (Cat).
Phase 4: Pelvic Health and Hip Flexor Release
The “hidden” cause of back pain at a desk is often the hips. When hip flexors are tight, they tug on the lumbar spine.
1. The Seated Figure-Four (Glute Stretch)
-
How to do it: While sitting, place your right ankle over your left knee. Keep your back straight and lean forward slightly from the hips.
-
Benefit: Relieves tension in the piriformis and glutes, which can mimic sciatica pain.
2. Standing Hip Flexor Lunge
You will need to stand up for this one.
-
How to do it: Stand next to your desk for balance. Step one foot back into a shallow lunge. Tuck your tailbone under (posterior pelvic tilt) and squeeze the glute of the back leg. You should feel a deep stretch in the front of the hip.
Phase 5: Core and Lower Back Stability
Your core is the “bridge” between your upper and lower body. If the bridge is weak, the whole structure sags.
1. Seated Leg Extensions
-
How to do it: While sitting, straighten one leg out in front of you and hold for 5 seconds. Flex your toes toward your face.
-
Why: This engages the quadriceps and stabilizes the knee, but more importantly, it requires the lower abdominals to engage to keep you upright.
2. Desk Plank
-
How to do it: Place your forearms on the edge of your sturdy (non-rolling!) desk. Step your feet back until your body forms a straight line from head to heels. Hold for 30–60 seconds.
-
Benefit: This builds functional core strength that supports your spine while sitting.
Phase 6: The “Micro-Break” Strategy
Knowledge is useless without implementation. The human body is not designed to be static. Research suggests that “micro-breaks”—short bursts of movement every 30 minutes—are more effective than one long gym session at the end of the day.
The 20-20-20 Rule for Eye Strain
While not a “muscle” stretch in the traditional sense, eye strain causes you to lean forward, ruining your posture. Every 20 minutes, look at something 20 feet away for 20 seconds.
The Standing Transition
If possible, use a sit-stand desk. However, don’t just stand still. Shift your weight from foot to foot, or perform calf raises while reading emails.
Advanced Corrective Exercises (The “Big Three”)
For those who have already developed significant postural issues, these three exercises are the “gold standard” for rehabilitation.
1. Wall Slides
-
Setup: Stand with your back against a wall, heels about 6 inches away. Your butt, upper back, and head should touch the wall.
-
Movement: Raise your arms to a “goalpost” position, with elbows and the backs of your hands touching the wall. Slowly slide your arms up and down without losing contact with the wall.
-
Challenge: This is incredibly difficult for those with tight shoulders but is the ultimate posture corrector.
2. Dead Bug (Floor Exercise)
If you have space in your office or a break room, the Dead Bug is the best way to teach your core to protect your spine.
-
How to do it: Lie on your back with arms reaching toward the ceiling and knees bent at 90 degrees (legs in the air). Slowly lower the opposite arm and leg toward the floor while keeping your lower back pressed firmly against the ground.
3. Bird-Dog
-
How to do it: On all fours, extend your right arm forward and left leg back. Maintain a neutral spine.
-
Focus: Stability over height. Don’t arch your back.
Psychological Aspects: Mindful Posture
Posture is often a reflection of our internal state. Stress causes us to hunch, pulling our shoulders toward our ears in a defensive “startle” reflex.
Diaphragmatic Breathing:
Poor posture compresses the diaphragm, leading to shallow chest breathing, which signals the nervous system to remain in “fight or flight” mode.
-
The Exercise: Place one hand on your chest and one on your belly. Breathe in through your nose so that only the hand on your belly moves. This physically forces your spine to straighten and lowers cortisol levels.
Creating a Daily Routine: A Sample Schedule
To make this sustainable, don’t try to do everything at once. Integrate it into your workday:
| Time | Activity | Target Area |
| 9:00 AM | Ergonomic Check | Setup/Alignment |
| 10:30 AM | Chin Tucks & Neck Rolls | Cervical Spine |
| 12:30 PM | Standing Hip Flexor Stretch | Hips/Pelvis |
| 2:30 PM | “W” Stretches & Chest Opener | Shoulders/Chest |
| 4:30 PM | Seated Spinal Twists | Thoracic Spine |
Long-term Benefits of Posture Correction
Committing to these exercises yields benefits far beyond avoiding a “hunchback.”
-
Increased Energy: When your lungs aren’t compressed, oxygen intake improves, reducing mid-afternoon fatigue.
-
Reduced Headaches: Most tension-type headaches originate from the suboccipital muscles at the base of the skull.
-
Improved Confidence: Biologically, an open posture (shoulders back, chest out) is linked to higher testosterone and lower cortisol, making you feel more assertive and capable.
-
Longevity: Proper alignment reduces wear and tear on joints, preventing osteoarthritis and degenerative disc disease in later years.
Conclusion
Your desk does not have to be a source of physical decline. By understanding the mechanical stresses placed on your body and counteracting them with targeted stretches and strengthening movements, you can maintain a resilient, pain-free body.
Consistency is the key. You are not “fixing” your posture once; you are engaging in a daily practice of movement. Start today with a single chin tuck, and your future self—standing tall and moving freely—will thank you.